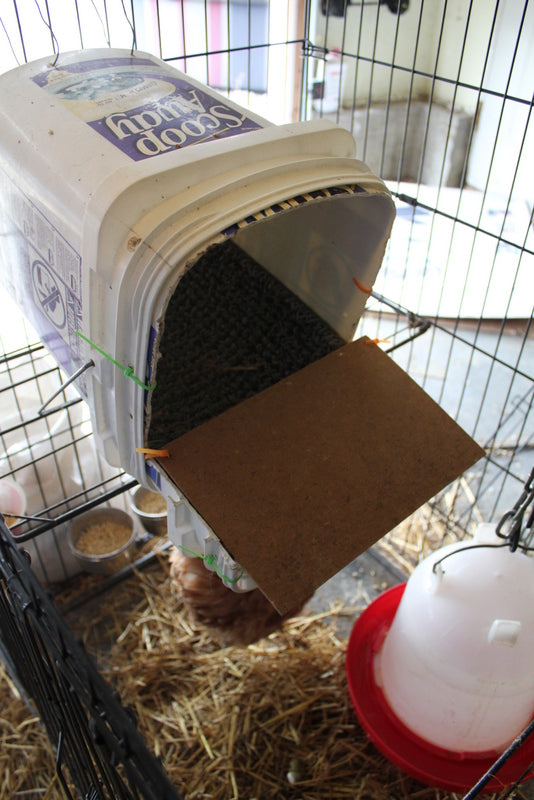
How to Build a DIY Roll-Away Nest Box: A Step by Step Guide
Back to blog
A DIY roll-away nest box is designed to keep eggs clean and prevent them from being cracked or eaten by hens. In this guide, we'll walk you through the process of creating your own roll-away nest box, therefore providing a comfortable and hygienic environment for your feathered friends.
Materials You'll Need:
- Wood: Choose untreated, durable wood like plywood or cedar.
- Screws and Nails: In addition, make sure they're appropriate for outdoor use.
- Saw and Drill: Essential tools for cutting and assembling the box.
- Measuring Tape and Ruler: In other words, precise measurements are crucial!
- Hinges: Needed for the top lid of the nest box.
- Nesting Material: Pine shavings, straw, or a Turf Nest Box Liner for the nest.
- Collection Tray: A plastic or metal tray to catch the eggs.
Step-by-Step Guide to build a DIY Roll Away Nest Box:
1. Design Your Nest Box:
Start by deciding on the dimensions based on your flock size. A common design is around 12-15 inches high, 12-15 inches deep, and 12-15 inches wide. Then, create a sketch or plan to visualize the structure.
2. Cut the Wood:
Then, using your saw, cut the wood into the required pieces. You'll need a front piece, a back piece, two side pieces, a bottom piece, and a lid. Remember to cut a hole in the front piece for hens to enter the nest box.
3. Assemble the Box:
After that, attach the sides to the back piece using screws or nails. Then, attach the bottom piece to the sides and back. Above all, ensure everything is sturdy and well-aligned.
4. Create the Roll Away Mechanism:
This is the key feature of your nest box. Cut an inclined floor from the back of the nest box to the front. After that, attach wooden slats or plastic strips to the floor, creating a gentle slope. This will then allow the eggs to roll away from the nesting area, preventing hens from accessing them.
5. Add the Collection Tray:
Beneath the sloped floor, place the collection tray where the eggs will roll and be safely collected. Then, make sure the tray is easily removable for cleaning and egg collection.
6. Install the Lid:
After that, attach hinges to the lid and then to the back of the nest box. This lid provides access for egg collection and cleaning. Ensure it opens smoothly and stays securely closed.
7. Finish and Decorate:
Then, sand any rough edges and surfaces to prevent splinters. You can then paint or stain the nest box to match your coop's aesthetics.
8. Nesting Material:
After that, add straw, hay, or wood shavings to the nesting area, creating a cozy and comfortable space for your hens to lay their eggs.
9. Place the Nest Box:
Next, install the roll away nest box inside your chicken coop at a comfortable height for your hens to access. Then, make sure it's securely fastened to prevent tipping over.
10. Observe and Adjust:
Finally, introduce your hens to the new nest box. Observe their behavior and make any necessary adjustments to ensure they're comfortable and using the box correctly.
Congratulations! In conclusion, you've successfully built your own DIY roll-away nest box. Above all, this simple addition to your chicken coop can go a long way in keeping eggs clean and minimizing the chances of them being damaged or consumed. Plus, it's a rewarding project that enhances the well-being of your feathered companions. Happy egg collecting!


