Welcome to chick parenthood! We’ve put together this quick-start guide to give you the basics. If you want to dive deeper, check out our Complete Baby Chick Care Guide.
Step 1: Make Sure You Have Time
Caring for baby chicks isn’t a “set-it-and-forget-it” kind of job. These fluffy little peepers need frequent check-ins—about five times a day—especially during those first few weeks. Be sure you (or a family member) can commit before you bring chicks home.
Step 2: Set Up the Brooder
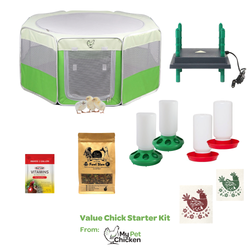
Your chicks' first home is called a brooder. This can be as simple as a big cardboard box, a clear plastic tote, an old playpen, or our handy Hen Pen Pop-Up Brooder. Whatever you choose, it needs to:
- Keep the chicks in
- Keep dangers out
Brooder Location Tips:
- Chicks are small and easy to handle, but they grow fast—and they’re messy!
- By 3 to 4 weeks old, they’ll be taking up more space and flinging bedding everywhere.
- You’ll only have them inside for 4-5 weeks, but plan your setup so you don’t go crazy!
How much space do they need?
Plan for 2 square feet per chick. It might sound like a lot, but you’ll see why once they start flapping around.
Step 3: Heat, Heat, and More Heat!
Baby chicks need to stay warm—like really warm!
- Week 1: 95°F
- Each week after: drop by 5 degrees until they’re ready for life outside.
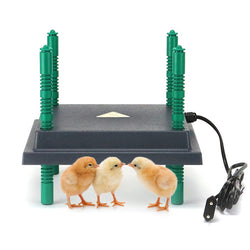
We don’t recommend those old-school 250-watt heat lamps (they’re a fire risk!). Instead, we prefer safe, low-energy chick heaters like this one.
How do you know if it’s warm enough?
- Cold chicks: Huddled under the heat source? They need more warmth!
- Hot chicks: Hanging far away and panting? They’re too hot!
- Happy chicks: Exploring, peeping softly, and spread out.
(And no, a 60-watt bulb isn’t enough heat—no matter what your cousin's neighbor says.)
Step 4: Bedding Basics
Chicks are adorable, but they poop. A lot.
Line their brooder with pine shavings (about 1” thick) or use paper towels for easy cleanup.
- Avoid newspaper (too slippery—can cause Splay leg issues).
- Never use cedar shavings (the fumes can hurt their lungs).
Clean the bedding when it starts to smell. (Your nose will know!)
Step 5: Water and Feeders Matter
No bowls, please! Baby chicks will walk in them, tip them over, and even drown (yikes).
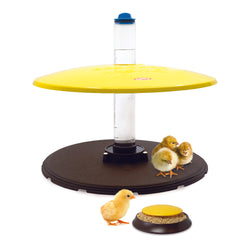
- Use a chick-sized waterer to keep water clean and safe.
- Grab a baby chick feeder—they’re made to minimize mess and waste.
Step 6: Feeding Your Chicks
This part is easy:
- Offer pre-formulated chick starter feed—either crumbles or mash.
- If your chicks are vaccinated for Coccidiosis, they’ll need unmedicated feed.
- Otherwise, consider medicated starter feed, which helps keep them healthy those first few months.
How much?
Give them unlimited access to food. Chicks self-regulate and won’t overeat. No rationing required!
When to switch feeds?
Check the label on your starter feed—every brand is different!
Step 7: Treats & Grit
Sure, you can give them tiny treats:
- Dried Mealworms
- Fresh Greens
- Bugs from the garden
But keep it minimal! Their starter feed has everything they need.
Once you offer treats, they’ll need grit (tiny stones they store in their gizzard to “chew” food).
Step 8: Outdoor Adventures
At 2-3 weeks old, if it’s warm (65-70°F) and sunny, they can have supervised outdoor time!
- Use a wire cage or temporary pen in a sunny spot.
- Make sure they have shade and water.
- Stay close—they’re vulnerable to predators and can fly surprisingly well at this age!
Step 9: Moving to the Coop
By 4-5 weeks old, it’s time for your chicks to move into their chicken coop.
- Plan ahead! If you’re buying a coop, it can take 3+ weeks to arrive.
- You’ll be so happy to have them (and the mess) outside!
You’ve Got This!
Raising baby chicks is such a fun and rewarding experience. With a little preparation and a lot of love, you’ll have happy, healthy chicks that grow into amazing backyard hens.
Need more info? Check out our Complete Baby Chick Care Guide for all the details OR Contact us with questions!


