What do I need to know about raising chicks?
Back to blog
Educate Yourself
Huzzah! You're here to learn about raising baby chicks, which is more than some people do! (You'd be surprised...).This is a condensed form of our full baby chick care guide, which you can find here.
Make sure you'll have enough time.
Raising baby chicks requires frequent care and monitoring, so make sure your schedule allows you or a family member to check on your chicks around five times a day.
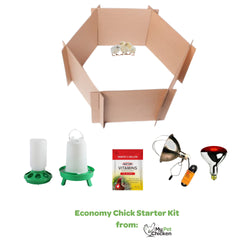
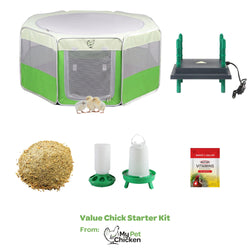
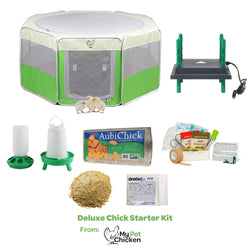
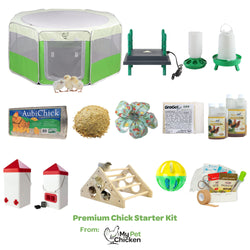
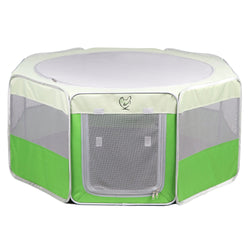
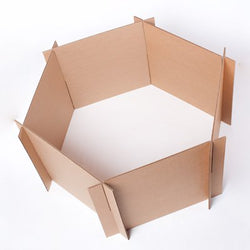
Brooder setup
The "house" you raise your chicks in is called a brooder. Your brooder setup is the one of the most important aspects of raising baby chicks. A brooder can be a large cardboard box, a clear plastic bin, an old pack-n-play, or we offer interlocking cardboard panels. Whatever you choose, it needs to keep the chicks in and threats out!You can place your brooder almost anywhere: chicks' small size makes them easy to handle! But keep in mind that chicks grow quickly, and that raising chicks is a messy job. By the time they're three or four weeks old, they'll be taking up a lot of space and making a big mess, so brooder placement is important. You will move them outside at 4-5 weeks of age, so you won't have to deal with the mess for too long... (more on that below).
Space
Whatever housing solution you go with, make sure it provides 2 square feet per chick. It sounds like a lot, but as they get older you'll see why this is necessary.
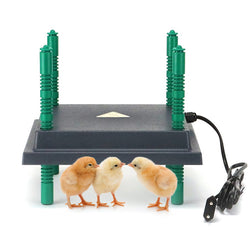
Heat source
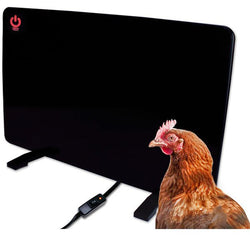
Baby chicks need to be kept surprisingly hot. The first week of their lives, they require an air temperature of 95 degrees, the second week 90 degrees, and so on, going down by around 5 degrees per week until they're ready to go "outside". We have a LOT to say about heating sources, since we have seen over and over again how 250-watt infrared heat bulbs can cause fires. We really can't recommend them. We like heaters like these.
How much heat is enough?
After placing your chicks in your brooder, pay close attention to how they behave. If they're crowded together directly under or adjacent to the heat source, they're cold. Lower the heater or add another. If, on the other hand, your chicks are avoiding the heat source and panting, they're too hot! Move the heater farther away. Happy chicks will be contentedly exploring all around the brooder.(Oh, and please don't listen to anyone who tells you a 60-watt bulb makes a good heater.)
Absorbent bedding
Baby chicks are big poopers! You'll need to line the brooder floor with an absorbent material. Pine or aspen shavings about 1" thick is a good choice, as are paper towels. (Don't use newspaper! It's not absorbent enough, and the slippery surface can lead splay leg. (DON'T use cedar shavings: the aromatic oils irritate chicks' lungs.)Change the bedding whenever it becomes stinky!
The right drinker/waterer for raising chicks
Don't try to use a dish or anything you have just "laying around". Dishes can make it easy for chicks to drown, and they'll certainly do naughty things like walk in it, spill it, kick their bedding materials into it, and poop in it - meaning you'll have to change it constantly. For the best results, use a specially-designed chick waterer. They come in a number of different sizes and shapes, all sufficient to do the job.
A feeder
Once again, resist the temptation to use a dish or bowl. Chicks will jump in and kick the feed all over the place, poop in it, tip it over and worse. Borrow or buy a "real" baby chick feeder. They're inexpensive!
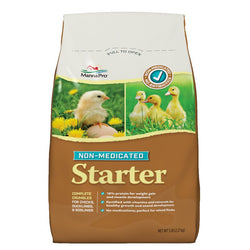
Feeding your baby chicks
Fortunately this one doesn't require much thought. You just buy pre-formulated chick starter feed, in either "crumbles" or "mash" (referring to how ground down it is). Either is fine. The only thing to know is that if you've had your chicks vaccinated against Coccidiosis, they'll need an un-medicated feed. If not, or if you've only had them vaccinated for Marek's Disease, medicated feed is a great way to keep them healthy those first few months.
How much to feed them?
As much as they want! Don't ration it. Give your birds 24/7 access to all the food they can eat. They're not like dogs. They'll self-regulate.
How long to offer starter feed before switching?
It all depends! Each manufacturer formulates their feed differently, so read the label and follow their instructions.
Offering Treats?
Kitchen scraps, worms or other bugs from the garden are okay in small amounts. Starter feeds contain everything chicks need to survive and thrive, and filling them up with too much of the "other stuff" can throw off their nutritional balance. But you'll need to offer them...
Grit: a must-have for raising baby chicks
Ever heard the saying "scarce as a hen's teeth"? That's right, chickens don't have them! Instead they eat tiny pebbles and store them in their chick grit, sand, parakeet gravel or canary gravel, available at your local pet store or grocery store pet aisle. You may sprinkle it in their feed, or provide it in a small bowl.
Transitioning your chicks outside
After raising chicks for 2-3 weeks, if it's warm outside (65-70 degrees at least) and sunny, feel free to let them have a little "outdoor time"! Put them in a wire cage or erect some other temporary housing and place it in the sun, making sure they have access to water and shade if they need it. They'll absolutely love digging around in the grass. But don't leave them unattended! At this age they're VERY good at flying and VERY susceptible to predators. Plus, if it's windy they'll get cold (and they'll let you know they're unhappy with their loud chirping).